Build time today 7.5 hours - Total build time 206.0 hours.
Man time today 11.0 hours - Total man time 234.0 hours.
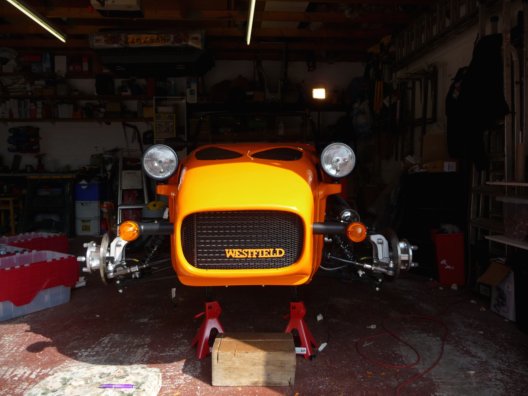
Final push for completion, possibility of completing this weekend. First off to finish off the front of the car, head lights, indicators, grill.
First of all I needed to get all the parts together, not that it is absolutely obvious what the parts are. In the end I realized I was an M6x20mm and repair washer down. Would use a shorter bolt and normal washer for the short term and replace later.
I first put the parts in place best as I could and clamped in place. The panels that cover the head lamp bracket aren't the best fit in the first place and getting them lined up was not easy, I could also see that they were fouling the front upper wishbone mounting bolts so I trimmed the cover to allow clearance.
First of all I needed to get all the parts together, not that it is absolutely obvious what the parts are. In the end I realized I was an M6x20mm and repair washer down. Would use a shorter bolt and normal washer for the short term and replace later.
 |
| notch cut out of cover to clear wishbone mount |
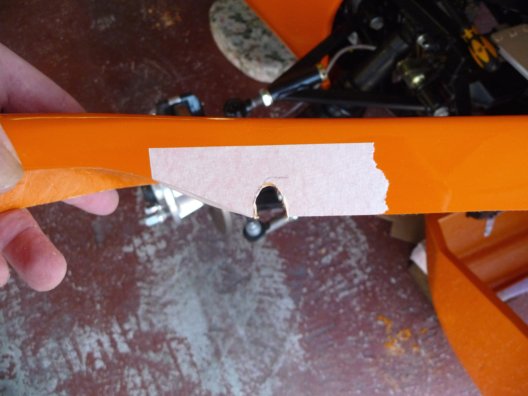
Once I had the basic positioning I marked the centre points on each side and measured there position relative to the front of the chassis. They appeared close but not quite the same on either side. I decided I ought to make sure the headlamps were positioned at the same point on the chassis on either side of the car. I took a bit of measuring and checking using masking tape on the bonnet and chassis before I was happy that the covers fitted and the brackets were consistent. Once done fixing was quite straightforward.
With the headlamp brackets and covers in place, I fitted the indicators, the holes had already been cut so this was a quick and easy process.
Now on to fitting the headlamps themselves. quite straight forward with the bonnet able to open past the vertical, once fully wired and with the bonnet only able to open normally loosening the nut slightly to allow adjustment is likely to be tricky. I think a box spanner will be needed and even then I will need to cut a slot in it to for the cable.
The headlamps came with the connectors already attached which made fitting the connector block a quick and easy task. The indicators had bullet connectors but I cut these off and used the connector blocks supplied that matched those on the loom. Unlike the rear lights these were no problem at all.
Next to tidy up the wiring a little and secure the indicator wires in side the nose section. I riveted a cable tie mount either side with the rivet positioned behind the headlamp mounting cover, this allowed the indicator wire to be secured, I also taped up an visible wires and used small cables ties to secure the wires together. I think I will need another look at the wiring but it can wait.


Now on to the grill, this was awkward, reaching into the cone was not easy. To allow easier access I undid the wires for the lights and indicators to allow the nose to hinge forwards as far as possible. In the end the brackets I had used were not secured quite well enough and I ended up drilling through the inner return edge of the nose to use cable ties. In the end quite a time consuming task.
 What to do next.
I continued with the dash next, there were still some of the switches and warning lights to be fitted and additional holes to be drilled or enlarged. So I started on that.
It was as I was doing that that Oli arrived eager to do something and from this point I continued with dash at odd moments.
I suggested he look at fitting the front wing brackets, while I looked at the rear wheel arch mud catcher plates.
Oli found the brackets and the assortment of nuts, bolts spacers and washers to fit them. I said to have a look in the build guide, but he could not find a section, I had a look and found a paragraph on the subject, so we had a look together, we divided the various bits into two pipes one for each wing and then tried to work out what was what, for each wing there were two spacers; two longer bolts; two shorter bolts; 3 pairs of washes (spring and flat) and four button head bolts with nuts and washer. The button heads are to secure the wings to the brackets, that left the odd assortment for the three fixing points. In the end we did not need to longer bolts and spacers and I needed to find a couple of shorter bolts from my spares.
I continued with the rear wheel arch mud catchers while Oli put the front wheels on. I decided we need to see how the wheels were in relation to the cycle wings before they were to be attached. As usual it is not obvious how the mud catchers fit, but I placed them best as I could and riveted on. I think there is still more to be done in this area but will come back to it once I have given it more thought.
On with the rear wheels and as it was a lovely sunny day we thought we would see if we could drive it out so unwrapped one of the seats to put in place and dropped the car off the axle stands. We could not get the mountings to line up with the holes the runners on the sport turbo seats look to be wider than the standard seats, so the seat when back in the corner covered up. I need to check with Westfield what needs to be done, do we use two of the existing holes, if so inner or outer, or do we need to modify all the existing holes. (modify all, is the answer).
So out with a few cushions and a set of mole grips to steer and try to start the car. Click. The ignition had been left on and the battery was flat, with only the ignition on it was difficult to tell, must remove the key in future. Out with the battery charger and on to something else.
Oli went and fetched the remaining interior bits from in the house. Some of them were not obvious as to where to fit them and there is little info on what to do. First job I pointed him at was to fit the handbrake adjustment panel and the rubber handbrake cover. This needed to be lined up and rivet nuts used so a little time was needed explaining how best to approach the process and which drill bit, etc was used. He fell into the same mistake using the rivet nut tool as I did applying too much pressure and sheering the mandrel. Having done it I explained how little force is needed, the transmission tunnel panel needed to be removed and there was enough thread showing through the bottom of the rivet nut to extract the broken section. Knowing they were a little fragile I had order a couple of spares so very little time was lost.
I had a quick look at the cycle wings but decided to continue with the dash while Oli looked at the interior side panels. We expected these to be a straight fit, but they weren't first we needed to trim a slot in the body work at the rear to allow the panels to fit and then had to trim them in a couple of places. As they are vinyl covered this meant pealing back the vinyl and trimming the aluminium. I would need some contact adhesive to re-secure the vinyl. This was a fiddly processes which took quite a while.
In general quite good progress but with what we thought would be straightforward processes taking much longer than anticipated not as much progress as I hoped for.
No comments:
Post a Comment